
News|Articles|February 5, 2025
Making ophthalmic exams easier for general practitioners
Author(s)Caitlin McCafferty, Editor
Ron Ofri, DVM, PhD, DECVO, provided veterinary professionals at the Veterinary Meeting & Expo conference ways to make ophthalmic exams less intimidating for general practitioners
Advertisement
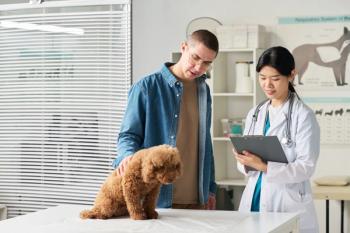
After general practitioners complete their preparation for an ophthalmic exam, gross inspection, and vision inspection, it is time to evaluate the pupils, examine the anterior structure, and use ophthalmoscopy. As general practitioners prepare to provide the final pieces of their exam, they may need some extra tips and tricks to make sure the exam is smooth and less stressful for veterinary professionals.
As part of this
Pupils
During the exam, once the team has dimmed the lights in the exam room the patient’s pupils should be dilated and evaluated. First, use a dim light and stand a short distance away from the patient so you can see both pupils at once through a tapetal reflection, which can also serve to highlight any ocular opacities by means of retroillumination, particularly in the vitreous or lens.
Next, a bright light is used to evaluate the Pupillary Light Reflex (PLR), which is a subcortical reflex. Ofri explained this does not test vision, and a cortically blind animal can present with a normal PLR. The PLR is usually presented in animals suffering from outer retinal degeneration, cataracts, and any other causes of subcortical blindness, though it could potentially be diminished or slow. This test is crucial to the examinationƒ because it can help the veterinary team localize the lesion causing the patient's vision loss. To help, Ofri offered this tip to attendees.
“Another very important point when testing the dazzle or the PLR, please use a fully charged trans illuminator. Use a strong source of light, not a cheap LED that you [buy] when filling up your gas tank at the station. Believe me, the most common cause for lack of PLR is the practitioner not using a strong enough source of light. It is very, very embarrassing when we get dogs referred to us for lack of PLR and it turns out that they have proper PLR,” Ofri said.
When it comes to the patients’ pupils, if one does not react to the light or cannot be visualized, the consensual PLR should be checked, or alternatively, the dazzle reflex. The dazzle reflex is also a subcortical reflex that manifests as a bilateral, partial blink in response to a bright light, he explained.
Advertisement
Examine the anterior structures of the eye
As veterinary professionals continue to this stage, the rest of the examination will be done in the dark with a focal light source and magnification to examine the anterior structures of the eye, in anatomical order.
First, the eyelids and eyelashes. Ofri explained the first step is to evaluate the size of the palpebral fissures to look for a narrowed or enlarged fissure. Then, carefully examine the skin and look for any signs of dermatological disorders or discharge. Veterinary professionals should pay extra attention to the eyelid margin because, in a normal animal, the veterinarian should be able to see the entire margin in close contact with the globe. If there is a lack of contact, it could be due to the ectropion but if you cannot see the margin or even parts of it, the lid could be everted.
A tip from Ofri for professionals is if there are any eyelash abnormalities, it may be better to see if the lid is slightly retracted.
“Our next tissue in this anatomical journey is the conjunctiva. And I guess you all know what normal mucus conjunctiva looks like, but if it's abnormal, you ask yourself whether there is edema or chemosis, whether there are congested vessels or other signs of inflammation, or, as I've said earlier, it may be a sign of systemic disease, such as a pale conjunctiva in the case of anemia icterus,” Ofri continued.
And then the third eyelid, which is an extra fold of the conjunctiva, will also need to be examined. Ofri explained that sometimes a foreign body could get stuck behind the inner aspect of the third eyelid. When it comes to the third eyelid, it should be hardly visible and mostly retracted at rest and the outer aspect can be examined by pressing on the globe, causing the third eyelid elevation. Veterinarians can examine the inner aspect of the 3rd eyelid after applying a topical anesthetic and eversion of the lid with fine forceps.
The cornea and sclera follow the examination of the conjunctiva and third eyelid. A normal cornea should be smooth and transparent, so any deviation from that represents a pathological change. Veterinary teams should look for a loss of transparency caused by edema, pigmentation, cellular infiltration, vascularization, lipid or mineral deposition, or fibrosis. Ofri explained that surface irregularities should also be looked for and can be caused by ulceration, iris prolapse, granulation tissue, perforation, or keratoconus. The corneal diameter should be evaluated, with a larger diameter indicating glaucoma and a reduced diameter potentially meaning micro-phthalic or phthisical eye.
The next step of the exam is to assess the depths of the anterior chamber, which is best visualized from the side according to Ofri. The anterior chamber may increase or decrease due to various intraocular diseases. The aqueous filling within the chamber should be clear, and opacities or masses such as fibrin, hypopyon, luxated lens, persistent pupillary membranes, iris cysts, or vitreous. Another cause could be a phenomenon called aqueous flare, which Ofri explained to attendees.
“Inflammatory material may be seen in the aqueous as a phenomenon that we call aqueous flare. The best example I can give you, or the best analogy I can give you, of what is aqueous flare is when you go to see a movie. You were sitting in a dark movie house. The lights went down. It's completely black. And then the propeller comes on at the back of the room, and you see all of these dust particles floating in the cinema house right? Same thing in the eye,” he continued.
The final step in the examination is the iris and pupil. General practitioners should look for alterations in the pupil shape, which could be caused by adhesions, iris atrophy, hypoplasia, or coloboma. If the patient is presenting with changes to the pupil color, it could be a sign of cataract, retinal detachment, or hemorrhage. For the size of the pupil changing, this could be caused by glaucoma, uveitis, or other diseases of the retina or nervous system.
Ofri explained that the surface of the iris should be examined for changes in color or masses, caused by inflammation, hemorrhage, or neoplasia.
The final step: Ophthalmoscopy
According to Ofri, this is the portion of the examination that clinicians dread the most. He believes it is partly because there is a large range of normal variations in the appearance of canine and feline fundus, although they are to a lesser extent when it comes to feline patients. This can make it difficult to diagnose abnormalities if veterinarians are not in the habit of performing the examination, which is why Ofri recommends performing these on every patient. The clients will not only be happy with the extra effort, but it gives veterinary professionals practice.
The exam should be conducted once the pupil is dilated in a dark room. First, the tapetal reflection should be evaluated to detect any opacities of the lens or vitreous. When approaching the patient, Ofri explained to focus on successively more posterior structures, the cornea, iris, lens, and vitreous, until becoming focused on the fundus. It is important to carefully inspect the complete fundus, evaluating changes in the tapetum, non-tapetum, blood vessels, and optic disc.
“If you are to remember one slide from everything I said up till now, it's this one, please do an ophthalmoscopic exam on every patient that walks into your clinic, not just on blind patients…on every patient that walks into your clinic, be it for vaccination or flea control or dietary consultation or whatever. The reason I say that is that...number 1, the technique is challenging to learn. There is a steep learning curve in order to become good in ophthalmoscopy,” he explained.
“Number 2, there are lots and lots of normal variations in the appearance of a normal fundus, especially in dogs. If you haven't done an ophthalmoscopy and you haven't practiced the technique and you haven't learned all the normal variations, you have no hope in hell of diagnosing a fundus with abnormalities or looking at the fundus of a blind animal,” Ofri concluded.
Reference
Ofri R. Ophthalmic Exam Made Easy! Presented at: Veterinary Meeting & Expo; Orlando, FL. January 25-29, 2025.
Newsletter
From exam room tips to practice management insights, get trusted veterinary news delivered straight to your inbox—subscribe to dvm360.
Advertisement
Related Content
Advertisement


Advertisement
Advertisement
Trending on dvm360
1
Proposed veterinary college receives approval from state's higher education board
2
USDA grants full approval for novel canine parvovirus therapy
3
Optimize presurgical nutrition to improve recovery
4
US Department of Justice files statement of interest in LMU lawsuit
5
